
Automotive replacement oxygen sensors play a crucial role in a vehicle's emissions control system. This article explores the significance of these sensors and provides a step-by-step guide on how to replace them, ensuring optimal performance and compliance with emissions regulations.
Subtitle 1: The Importance of Automotive Replacement Oxygen Sensors Subtitle 2: Step-by-Step Guide on Replacing Car Oxygen Sensors
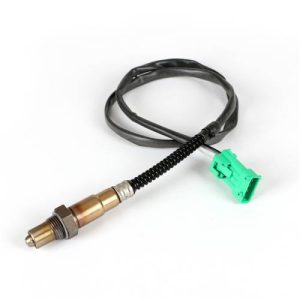
The Importance of Automotive Replacement Oxygen Sensors: Automotive replacement oxygen sensors, also known as O2 sensors, are essential for several reasons:
Emissions Control: O2 sensors measure the oxygen content in the exhaust gases, allowing the vehicle's engine control unit (ECU) to adjust the air-fuel mixture for optimal combustion. This helps reduce harmful emissions and ensures compliance with environmental regulations.
Fuel Efficiency: By providing accurate readings, O2 sensors help the ECU optimize the air-fuel mixture, resulting in improved fuel efficiency. This saves money at the pump and reduces the vehicle's carbon footprint.
Engine Performance: Properly functioning O2 sensors contribute to better engine performance, smoother operation, and reduced engine wear. They help maintain the correct air-fuel ratio, leading to improved power delivery and drivability.
Step-by-Step Guide on Replacing Car Oxygen Sensors: Here is a step-by-step guide on how to replace car oxygen sensors:
Step 1: Safety Precautions: Ensure the vehicle is parked on a flat surface and the engine is turned off. Wear safety gloves and protective eyewear before starting the replacement process.
Step 2: Locate the Oxygen Sensor: Refer to the vehicle's manual or seek professional advice to locate the oxygen sensor that needs replacement. O2 sensors are typically found along the exhaust system, both upstream and downstream of the catalytic converter.
Step 3: Disconnect the Electrical Connector: Carefully detach the electrical connector from the existing oxygen sensor. This may involve pressing or sliding a release tab and gently pulling the connector apart.
Step 4: Remove the Old Sensor: Using an appropriate wrench or socket, loosen and remove the old oxygen sensor from its mounting position. Apply moderate force while being cautious not to damage surrounding components.
Step 5: Install the New Sensor: Take the replacement O2 sensor and thread it into the mounting position. Ensure a snug fit but avoid over-tightening to prevent damage. Make sure the sensor is oriented correctly.
Step 6: Reconnect the Electrical Connector: Attach the electrical connector of the new oxygen sensor to the vehicle's electrical connector. Ensure a secure and proper connection.
Step 7: Test and Verify: Start the vehicle's engine and observe the O2 sensor's readings using a diagnostic tool or scanner. Check for any error codes and monitor the sensor's functionality.
Conclusion: Automotive replacement oxygen sensors are vital for emissions control, fuel efficiency, and engine performance. By following the step-by-step guide, you can successfully replace the car's oxygen sensors and ensure optimal performance. Regular maintenance and timely replacement of these sensors contribute to a cleaner environment, improved fuel economy, and smoother operation. Prioritize the health of your vehicle and the environment by replacing worn-out oxygen sensors with high-quality replacements.


Leave a Reply