
Automotive replacement oxygen sensors are essential components of a vehicle's emissions control system. This article provides valuable information on the methods and tips for replacing these sensors, ensuring optimal performance and compliance with emissions regulations.
Subtitle 1: Understanding Automotive Replacement Oxygen Sensors Subtitle 2: Methods for Replacing Automotive Oxygen Sensors
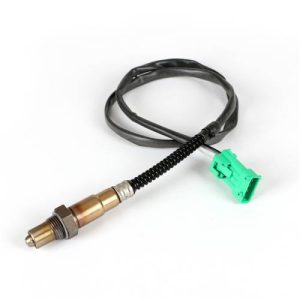
Understanding Automotive Replacement Oxygen Sensors: Automotive replacement oxygen sensors, also known as O2 sensors, are responsible for measuring the oxygen content in the exhaust gases. This information is crucial for the vehicle's engine control unit (ECU) to adjust the air-fuel mixture and ensure optimal combustion efficiency. Here are some important points to understand:
Sensor Types: There are two main types of automotive oxygen sensors: the upstream sensor (before the catalytic converter) and the downstream sensor (after the catalytic converter). It is essential to identify the correct sensor location before proceeding with the replacement.
Signs of Sensor Failure: Common signs of a failing oxygen sensor include a check engine light, poor fuel efficiency, rough idling, and increased emissions. If you notice any of these symptoms, it may be time to replace the sensor.
Methods for Replacing Automotive Oxygen Sensors: When it comes to replacing automotive oxygen sensors, there are a few methods that you can follow:
DIY Replacement: If you have basic mechanical skills and the right tools, you can attempt a DIY replacement. Start by locating the faulty sensor, disconnecting the electrical connector, and removing the old sensor using an appropriate wrench or socket. Install the new sensor by threading it into the mounting position and reconnect the electrical connector.
Professional Installation: For those without the necessary tools or expertise, it is recommended to seek professional assistance. Automotive technicians have the knowledge and specialized tools to efficiently replace the oxygen sensors, ensuring proper installation and accurate readings.
Tips for Replacing Automotive Oxygen Sensors: Consider the following tips when replacing automotive oxygen sensors:
OEM or High-Quality Aftermarket Sensors: Choose original equipment manufacturer (OEM) sensors or high-quality aftermarket sensors to ensure compatibility and reliable performance. These sensors are designed to meet the specifications of your vehicle, providing accurate readings and long-lasting durability.
Proper Sensor Handling: Handle the new oxygen sensor with care, as it is a delicate component. Avoid touching the sensor's tip or getting it contaminated with oil, dirt, or other substances. This ensures accurate readings and optimal performance.
Clearing Error Codes: After replacing the oxygen sensor, it is recommended to clear any error codes stored in the vehicle's ECU using an OBD-II scan tool. This will reset the check engine light and ensure the new sensor is functioning correctly.
Conclusion: Replacing automotive oxygen sensors is crucial for maintaining optimal engine performance and reducing emissions. Whether you choose to perform a DIY replacement or seek professional assistance, ensure you use high-quality sensors and follow the recommended methods. By replacing faulty sensors, you can improve fuel efficiency, reduce emissions, and enjoy a smoother driving experience.


Leave a Reply