
Greetings to all automobile enthusiasts and readers eager to delve into the world of automotive maintenance and precision! In the realm of engine efficiency and emission control, one component plays a pivotal role—the oxygen sensor. This article serves as a comprehensive guide, unveiling the step-by-step process and essential precautions for replacing the 234-9051 Oxygen Sensor. Embark on this journey of automotive precision, ensuring your vehicle operates at its optimal performance.

Understanding the Significance of the 234-9051 Oxygen Sensor
A Crucial Component in Emission Control
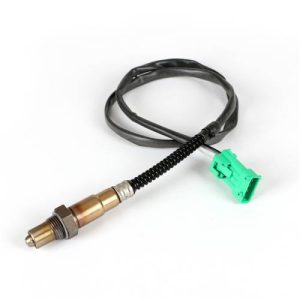
The 234-9051 Oxygen Sensor, also known as the 234-9051 O2 sensor, holds a key position in the engine management system. This sensor monitors the oxygen content in the exhaust gases and provides data to the engine control module (ECM), enabling it to regulate the air-fuel mixture for efficient combustion and reduced emissions.
Step-by-Step Guide to 234-9051 Oxygen Sensor Replacement
Preliminary Preparations
Begin by ensuring your vehicle is parked on a level surface, the engine is turned off, and the parking brake is engaged. Safety glasses and gloves are recommended for personal protection.
Locating the 234-9051 Oxygen Sensor
Consult your vehicle's manual or online resources to locate the position of the 234-9051 oxygen sensor. It's commonly situated along the exhaust system.
Disconnecting the Old Sensor
Gently detach the 234-9051 oxygen sensor from the wiring harness using the appropriate wrench or socket set. If any corrosion is present, apply a penetrating oil to ease the removal.
Removing the Old Sensor
Utilize an oxygen sensor socket or appropriate wrench to carefully unscrew the old sensor. Remember to turn counterclockwise to loosen it.
Preparing the New Sensor
Apply anti-seize compound to the threads of the new 234-9051 oxygen sensor to prevent future corrosion. Begin screwing in the new sensor by hand before utilizing a torque wrench to tighten it to the manufacturer's specifications.
Reconnecting the Wiring Harness
Ensure a secure connection by attaching the wiring harness connector to the new sensor. Verify that it fits snugly to prevent any electrical issues.
Precautions for Successful Replacement of 234-9051 oxygen sensor
Avoiding Over-Tightening
Ensure you do not over-torque the oxygen sensor during installation, as this can damage the threads or sensor itself.
Protecting Wiring and Components
Be cautious not to damage any wiring or components during the replacement process. Maintain a gentle approach to prevent unintended repercussions.
Conclusion
In conclusion, the replacement of the 234-9051 Oxygen Sensor requires both precision and automotive insight. By following this detailed guide and considering crucial precautions, you are embracing a proactive approach to maintaining your vehicle's optimal performance and emission control. The oxygen sensor stands as an emissary of combustion efficiency, playing a significant role in your vehicle's harmony with the environment. Navigate this journey with care and precision, driving forward with the assurance that your vehicle's engine efficiency is guided by the accuracy of a well-replaced oxygen sensor.


Leave a Reply