Your cart is currently empty!
How to Test and Replace Sensor de Oxigeno in Your Car
Introduction: The sensor de oxigeno, also known as the oxygen sensor, is a critical component in a car's engine management system. It helps regulate the air-fuel mixture, ensuring optimal performance and reducing harmful emissions. In this article, we will guide you on how to test and replace the sensor de oxigeno in your vehicle.
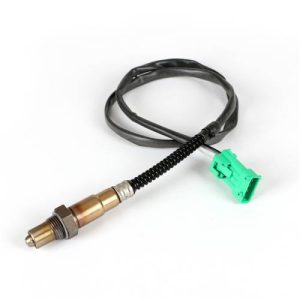
Understanding the Role of Sensor de Oxigeno: The sensor de oxigeno measures the oxygen level in the exhaust gases, providing essential data to the engine control unit for optimizing fuel efficiency and reducing emissions.
Signs of a Faulty Sensor de Oxigeno: Common signs of a faulty sensor de oxigeno include poor fuel economy, rough idling, engine misfires, and increased emissions. These indicators may prompt the need for testing and replacement.
Testing the Sensor de Oxigeno: To test the sensor de oxigeno, you will need an OBD-II scanner. Connect the scanner to the OBD-II port and follow the instructions to retrieve the sensor data. Compare the readings to the specified values to determine if the sensor is functioning correctly.
Steps to Replace a Faulty Sensor de Oxigeno:
Locate the sensor de oxigeno: Refer to the vehicle's service manual to find the sensor's position, typically on the exhaust manifold or catalytic converter.
Disconnect the electrical connector: Carefully unplug the connector attached to the sensor.
Remove the sensor: Use an appropriate wrench or socket to loosen and remove the sensor from its mounting location.
Install the new sensor: Apply anti-seize compound to the threads of the new sensor and carefully install it into the designated spot.
Reconnect the electrical connector: Ensure a secure connection between the new sensor and the vehicle's wiring harness.
Choosing the Right Replacement Sensor: Consider factors such as compatibility with your vehicle's make and model, sensor type (heated or unheated), and quality from reputable brands to ensure proper functionality and longevity.
Installation of the New Sensor: Follow the reverse order of removal to install the new sensor securely. Be cautious not to overtighten the sensor during installation.
Final Testing and Verification: After replacing the sensor de oxigeno, start the engine and check for any warning lights or abnormal behavior. Use the OBD-II scanner to confirm that the new sensor is providing accurate readings.
In conclusion, testing and replacing a faulty sensor de oxigeno is crucial for maintaining optimal engine performance and reducing emissions. By following the steps outlined in this guide and selecting a compatible replacement sensor, you can ensure your car runs efficiently and meets environmental standards.


Leave a Reply