
Benefits of using the 12230 Oxygen Sensor Thread Chaser for oxygen sensor installation
As a prominent voice in the field of automotive news, we delve into the intricacies of maintaining and repairing your vehicle's critical components. In this article, we provide a comprehensive step-by-step tutorial on how to replace a malfunctioning 2349036 Oxygen Sensor, ensuring your vehicle's optimal performance and emission control.

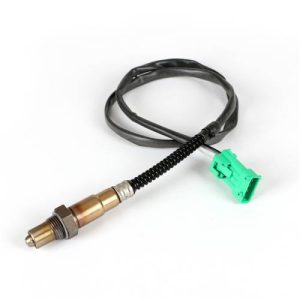
The Importance of the 2349036 Oxygen Sensor
The 2349036 Oxygen Sensor is a vital component in your vehicle's exhaust system, responsible for monitoring the oxygen levels in exhaust gases. When this sensor malfunctions, it can lead to reduced fuel efficiency, increased emissions, and compromised engine performance. Replacing a faulty sensor promptly is crucial to maintain your vehicle's smooth operation and compliance with emission standards.
Step-by-Step Tutorial on Replacing the 2349036 Oxygen Sensor
Replacing a faulty oxygen sensor might seem daunting, but with the right tools and guidance, it's a task that can be accomplished with relative ease. Here's a step-by-step tutorial:
Gather the Required Tools: Ensure you have the necessary tools on hand, including a wrench, jack stands, and a new 2349036 Oxygen Sensor.
Safety First: Park your vehicle on a level surface and engage the parking brake. Use jack stands to lift the vehicle safely and securely.
Locate the Faulty Sensor: Depending on your vehicle's make and model, the oxygen sensor might be located in different positions within the exhaust system. Consult your vehicle's manual to accurately locate the 2349036 Oxygen Sensor.
Disconnect and Remove: Use the wrench to disconnect the sensor's electrical connector. Carefully loosen and remove the sensor from its mounting point using the appropriate socket.
Install the New 2349036 Oxygen Sensor: Apply a small amount of anti-seize compound to the sensor's threads to facilitate future removal. Carefully thread the new 2349036 Oxygen Sensor into its mounting point and tighten it to the manufacturer's specifications.
Reconnect the Electrical Connector: Attach the electrical connector to the new sensor.
Test the Installation: Start your vehicle and ensure that the "Check Engine" light is no longer illuminated. Monitor your vehicle's performance and emissions for any improvements.
2349036 Oxygen Sensor Professional Assistance
While replacing an oxygen sensor is feasible for many vehicle owners, it might require specialized tools and expertise in some cases. If you're unsure or uncomfortable with the procedure, it's advisable to seek the assistance of a professional mechanic.
Conclusion
In conclusion, understanding how to replace a faulty 2349036 Oxygen Sensor is pivotal for maintaining your vehicle's performance and emissions control. By following this step-by-step tutorial, you can accomplish the task effectively and enhance your driving experience. Remember that if you encounter any challenges or uncertainties, seeking the guidance of a professional mechanic ensures a seamless replacement process. Your vehicle's optimal performance and environmental responsibility are worth the effort of ensuring a well-functioning oxygen sensor.


Leave a Reply