
If you own a Thunderbird and are looking to improve its environmental impact and overall performance, one essential component to consider is the 15717 oxygen sensor. In this article, we will guide you through the process of installing the 15717 oxygen sensor to help make your Thunderbird more environmentally friendly.

Understanding the Role of the 15717 Oxygen Sensor
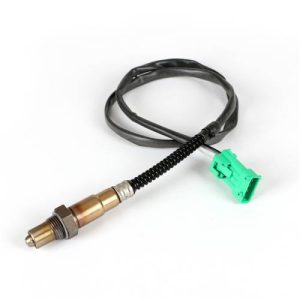
Before we dive into the installation process, it's essential to understand why the 15717 oxygen sensor is crucial for your Thunderbird. This sensor is responsible for monitoring the oxygen levels in the exhaust gases and providing real-time feedback to the engine control unit (ECU). This information helps the ECU optimize the air-fuel mixture, leading to improved fuel efficiency and reduced emissions.
Steps for Installing the 15717 Oxygen Sensor
Installing the 15717 oxygen sensor is a relatively straightforward process, but it requires attention to detail and care. Here are the steps to follow:
Safety First: Ensure your Thunderbird is parked on a level surface and the engine is cool before starting the installation.
Locate the Sensor: Find the location of the existing 15717 oxygen sensor in your exhaust system. It's usually located before or after the catalytic converter.
Disconnect the Battery: For safety reasons, disconnect the negative terminal of the battery to prevent any electrical mishaps during the installation.
Remove the Old Sensor: Use an oxygen sensor socket or wrench to carefully remove the old sensor. Be cautious not to damage the wiring or the threads on the exhaust manifold or pipe.
Install the New Sensor: Apply anti-seize compound to the threads of the new 15717 oxygen sensor. Thread it into the same location where you removed the old sensor. Tighten it securely but avoid over-tightening.
Connect the Wiring: Reconnect the electrical wiring to the new sensor. Ensure the connection is secure and that the wiring is properly routed to avoid any damage.
Reconnect the Battery: Reconnect the negative terminal of the battery.
Start the Engine: Start your Thunderbird and let it run for a few minutes to allow the new 15717 oxygen sensor to warm up and begin providing data to the ECU.
Check for Errors: Use an OBD-II scanner to check for any error codes related to the oxygen sensor. If none are detected, you've successfully installed the 15717 oxygen sensor.
Benefits of the 15717 Oxygen Sensor
By installing the 15717 oxygen sensor in your Thunderbird, you can enjoy several benefits:
Reduced Emissions: The sensor helps your Thunderbird produce fewer harmful emissions, contributing to a cleaner environment.
Improved Fuel Efficiency: Optimized air-fuel mixture results in better fuel economy.
Enhanced Engine Performance: A properly functioning oxygen sensor leads to smoother engine operation and consistent power delivery.
Conclusion:
Installing the 15717 oxygen sensor in your Thunderbird is a simple yet effective way to make your vehicle more environmentally friendly while also improving its overall performance. Following the installation steps carefully ensures that the sensor operates optimally, contributing to lower emissions and better fuel efficiency. Make the environmentally conscious choice and upgrade your Thunderbird with the 15717 oxygen sensor today.


Leave a Reply